Sunday, June 10, 2012

To Conquer the Stars Part IV

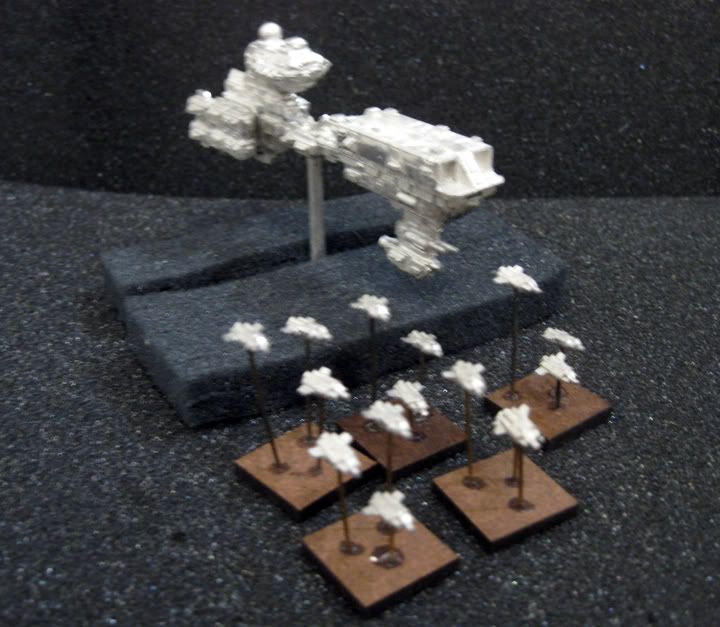
So previously I mentioned that I purchased some of the photon torpedo markers from Amarillo Design Bureau. I'm not sure if they still sell them. Nice sculpts, not very clean however. But after painting them up I like how they look and I think they will look great on the table. I have included a few pics I have taken of them so far

These should look really great flying around the table blowing stuff up!
This is my favorite shot!
Large Photon Torpedo/Plasma Marker - Close Up
Medium Photon Torpedo/Plasma Marker - Close Up
Small Photon Torpedo/Plasma Marker - Close Up
More news on the Full Impulse (Star Trek Variant) campaign that we will be kicking off soon. I have started to adapt the Battletech Chaos Campaign rules over for use with Full Thrust. So far so good. I have nine generic tracks written out and have plans for six story arc tracks (three to a side) as well as adapted rules for ship repairs/refit/upgrades and crew advancement.

Once I get them full adapted I'll post them somewhere to make them available for other to use (and of course modify as they see fit). It is a work in progress however so I figure it will require some playtesting during our own campaign to make sure they are balanced. Looks like we are up to five players so far - Chris, Paul, Josh, Emmi and myself. I'd love to find at least one other player to balance out the sides. More news as it develops!

Wednesday, May 16, 2012

To Conquer the Stars Part III

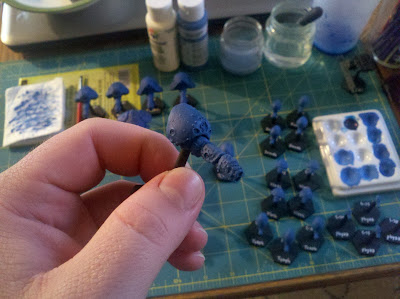
I have been pretty busy the last week so my progress has slowed a bit. I did manage to finish up the Phalon fleet before i got swamped with real life. I have been wanting to get a post done with pics of the finished Phalons. I also got all of my Kra'Vak assembled as well as the Plasma Bolt tokens for the Phalons. I just need to prime them and slap some paint on them...

The Kra'Vak looking menacing as always!
The are the Amarillo Design Group Photon Torpedo markers I will be using for the Phalons.
I have been wrestling with a question of how to handle my fighters as well. They are not such a big factor in the style of games we plan to play - being Star Trek is fighter light. However I would like to get them all finished at the same time as the fleets if at all possible. A while back I participated in a Full Thrust campaign and it was so easy to come by resources that before to long we had huge fleets with twenty plus ships and thirty plus fighter groups. I happened to just be getting my Full Thrust models at the same time so I actually based my fighters on little wooden discs. One fighter per disc with enough room to stick a d6 behind it to keep track of fighter group losses. My question is this... Should I keep them that way, or should I get some GZG fighter bases and base them properly? My inclination is to do the later because I think they would look better, but what do you think. Here is what they currently look like and here is what a properly based group looks like...

Originally based to make swarms of fighter groups... now I'm not so sure.


This image is from Laughing Ferret Lab well worth taking a peek at and the other idea I am thinking of using for the fighter groups. Your opinions are welcome though I am leaning towards this idea.
Here are some pictures of my completed Phalon fleet...

Yay! My first fleet is completed (minus the fighters and plasma markers but still).
Front view closeup with the Macro setting...

and the view from the rear where you can see the thruster glow!

Sunday, May 6, 2012

To Conquer the Stars Part II

I've made some progress on the fleets this last few days. I am about half done with my Phalon fleet with all of the base coating and wash being finished. I am about halfway through the dry brushing and then I just want to go back over them and add a few small details. Engine glow mostly. Here are the picks of the Phalon fleet WIP.

Shades of blue - I thought about doing green but not only were my color choices limited but I thought they would look to much like Zentradi ships.

Close up of a Light Cruiser... I can't wait to see these boys in action!
So Chris continues to be pretty excited by the whole idea of running this as a Star Trek style fleet battle game so I did some research and found that there was a great conversion done by W. Scott Field which I think really capture the spirit of Star Trek using the Full Thrust rules called Full Trek, he also has a few other sci-fi setting conversions on his site. For those of you unaware the Full Thrust rules (all four books) are now free to download off the designers website, Ground Zero Games, there is also a link to their store where you can buy models of all the ships (and then some) found in the book.

I have also decided on a paint scheme for the Kra'Vak. I will be doing a light grey with a charcoal wash with a grey drybrush. I will be painting the rail guns and engine glow red. I also plan to add tiger striping in white. I "should" be finished with the Phalons within the next days and then I'll start cracking on Kra'vak.

Wednesday, May 2, 2012

To Conquer the Stars Part I

I recently made a new friend at work, Chris, who is a gamer (mostly rpg's & board games) however he has taken an interest in some of my miniature games namely Full Thrust because he is an avid fan of Star Trek. Well Chris and I were recently talking about dusting off some of these miniatures I own that I have never used and it got me digging into the closets looking for the boxes of Full Thrust miniatures that I bought about two years ago. I found all of them... which was amazing considering they were in three different places and I have moved three times in the last two years.

After taking everything out and giving them the once over I realized there was quite a bit of work to do. I have a New Israeli fleet already to go, although I would really like to repaint them or at least add some further details at some point. I have a Kra'Vak and Phalon fleet as well already assembled and I need to just pick some colors and start slapping on the paint. I think that is a good point to start because after that everything will require some assembly. However, I do have a small O.R.C. fleet, a small Pirate/Reaver fleet, a small UNSC fleet, a large FSE fleet as well as a mix of civilian/commercial ships. I think once I get done with the Kra'Vak and Phalon fleets I will put together the O.R.C. fleet as I just love the look of those ships and follow that up with the civilian/commercial ships to help vary the objectives with.

Chris has offered to help me whip some terrain together for this as well which in all actuality shouldn't take long as I already have the asteroids made they just need to be glued to bases. I have some closed cell polystyrene to make planets from as well so my table will look appropriately celestial. I even have some black fabric to use for a table cover on my 4x4 table. I'm hoping to have a game of Full Thrust going inside of a month if my schedule permits.

New Israeli Fleet

Phalon Fleet (in need of some color)

Kra'Vak  Capital Ships

The remaining Kra'Vak. I actually have another whole bag of ships to assemble.

A Pirate/Reaver Fleet
The O.R.C. Fleet which is by far my favorite looking fleet. i can't wait to get these put together.
All three fleets that can be used now. The Pirates/Reavers and the O.R.C. fleets are in the bags behind the New Israeli's. The bag in front of the Phalons are markers I will be using as their primary weapons. I think they are actually photon torpedo markers from the Amarillo Design Group. Behind the Phalons are their fighters swarms. In front of the Kra'Vak are the extra ships I still need to assemble and behind them are the heavy fighters.
A close up of the New Israeli Fleet
The Phalon Fleet close up
Lastly the intimidating Kra'Vak Fleet in your face!

Sunday, April 15, 2012

Malifaux Terrain Progress Part III

I finished up a few more terrain pieces over the last few days. They did not end up quite as I originally planned them for a couple reasons. First, I had initially decided to do the Magic Nexus, Dead Zone and Hazardous Terrain in different colored flocking. I even went so far as to make two of the colors I planned to use - purple and a orange/copper color. I liked them although I need to (cough, cough) "filter" the saw dust a little better. There was to many little tiny twigs in them which I can pick out but it will still be a bit of a pain. The odd thing was until I started mixing the saw dust with the color it was almost invisible to the eye.

My first batch of homemade flocking!

A lifetime supply of purple flocking. You can really see the bits of twigs mixed in.
The copper colored flock
You can see it broken up here and I look forward to when I start working on my western terrain.
So after giving it some thought I decided to cover the remaining three terrain pieces with my normal mixed flocking. They turned out really good but then of course I needed to come up with some other ideas for the pieces i had intended to make - Magic Nexus, Dead Zone and Hazardous Terrain.

I love this piece. I do think i might want to use one more highlight color along the trail.
This piece is going to look great on the table.
This was originally going to be the Magic Nexus but I like it like this a lot more.
All of the pieces together. Just imagine all of the charge lanes these block!
When I was on my hike I found some really nice quartz crystals and I think they would make a great accent for the Magic Nexus/Soulstone Vein terrain piece. I plan to use the purple flocking to finish that piece off as well. I have set the Hazardous Terrain (Toxic Pool) aside for now but I saw a piece another person had done that looks great and I want to replicate that at some point. You can see the piece I have in mind here. Its the fifth picture down. I also really like the Campsite and Scrap Pile they did as well. I think they look great and i hope mine turn out even half as nice. Finally I decided I want to make my dead zone a cracked desert and I have an idea of how I want to accomplish that but I talk about that more in another post.

Crystal Quartz... but I see Soulstones.
The other piece I am working on is the Ancient Monument. I have the basic pillar done and I do have a miniature I want to use for the top but I have to dig it out still. so here is the basic pillar to tide you over. My friend Josh glued this together and he used an exacto to scratch up the surface. I think it will look magnificant once its all painted up. Here is a preview.

I'm actually very excited to see how this turns out.

Thursday, April 5, 2012

Malifaux Terrain Progress Part II

I made some progress on my terrain pieces recently. I got the mid-tone and highlight applied to all six pieces and I'm very pleased with the results. The next day my girlfriend and I went for a hike and found some very nice rocks for making terrain pieces with. I was really pleased with how the boulder pieces turned out but I decided that I wanted to make more of them to use with Legends of the Old West. I want to make them look a bit more like desert terrain and I even have two of those Woodland Scenic desert terrain sets. They have about fifteen or so plastic cacti in them. All I have to do to finish the last three terrain pieces is to mix up the batch of colored flocking I want to use. There are actually three colors - grey for the dead zone, purple for the magic nexus and orange for the hazardous terrain. I'm going to use the Rubbishinrubbishout method and I'll put up a post afterward. In the mean time... pictures!


four down two to go!

All done with the highlights!

The boulder pieces are flocked! I plan to do three more with a desert scheme.


Thursday, March 29, 2012

Malifaux Terrain Progress Part I

I wanted to just do a quick update on my activities this last month. It might appear that I have not really done anything, however I have been busy with another hobby. I use to DM several 2nd  and 3rd edition D&D games and I recently found several of my binders of campaign notes. I decided to type them up and get them into an electronic format. i just finished two nights ago having finished the last of five campaign worlds. I'll probably dedicate an entire update to those worlds at some point but for now suffice to say i am quite pleased to have them all finished.

I have also taken some updated pictures of the terrain pieces I had been working on now that I have reapplied the basing material. I think they look much better and will be working on them over the next few nights to get them finished up. Mostly I just need to apply the highlight colors. The flocking is a different matter as I need to actually make the flocking in the colors I want. I have all the supplies I need to do that though.

A mixture of fine sand, kitty litter, watered down glue and my base color and viola!

Five more to go. The hardest part is getting between the rocks.

Now they are ready for my mid-tone and highlight colors.

Tuesday, February 28, 2012

Back in the saddle...

Well, it has been quite a while since my last post, which is ironic since in my last post I had said I was going to try to start making regular posts again. I moved  shortly after my last post and ever since I have been working on getting my space set up for my hobbies.

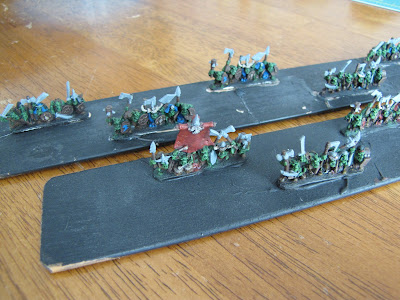
As it happens I have been working on several projects. For starters I finished the second unit of Orc Warriors for my Orc Warmaster army. I have also gotten the third unit about half finished. I have all the base colors applied and I only have to get through the highlights.


I recently decided to set aside the Warmaster project on account that there are no players in my area. However, my girlfriend and my friend Josh both have expressed interest in Malifaux which is a game I use to play before moving. I have a bunch of figures for it most of which need to be assembled and painted... big surprise I know. So, after giving it some thought Josh and I started work on some Malifaux terrain pieces.

We started by looking at the terrain pieces used in the first rulebook and settled on several specific pieces as well as a few generic ones. Below is the list of pieces we have started.

Dead Zone
Hazardous Terrain
Magic Nexus
Mysterious Effigies x3
Ancient Monument
Boulder Piles x3


I am using old cds as the bases for these and I just started by gluing down the rocks. I then used water down glue and sprinkled sand mixture, however I realized just yesterday that I should have made my porridge mixture and applied that instead, it looks much better. I plan to mix some up on Wednesday and finish them up.

I also found a great video on youtube to making colored flocking and here is the link. I'm going to make some this week as well. Rubbishinrubbishout has some great videos and I highly recommend you take a look at what he has to offer.